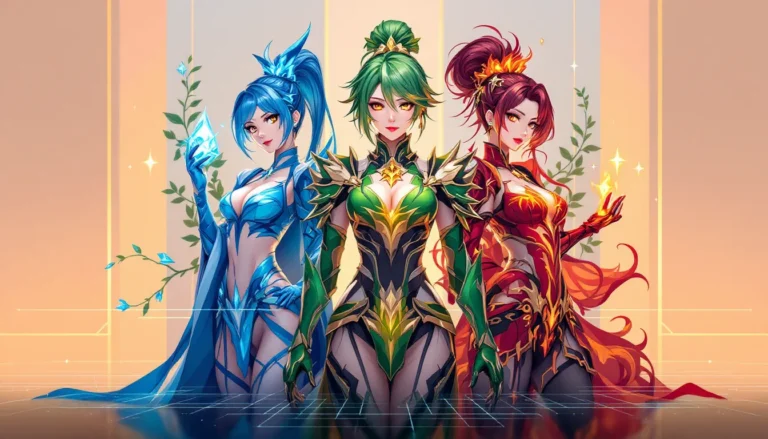
Building a strong team in Genshin Impact is the difference between steamrolling Spiral Abyss and getting stuck on Floor 9. Every player eventually hits that wall where raw character power isn’t enough, you need synergy, roles, and a solid understanding of how elements interact. This guide breaks down the core principles of team composition, from reaction mechanics to meta builds, so you can construct teams that actually work instead of just throwing your favorite characters together. Whether you’re running 36-star clear strategies or just trying to farm domains efficiently, mastering team composition transforms how you play.
Table of Contents
ToggleKey Takeaways
- A strong Genshin Impact team builder strategy prioritizes elemental reactions and synergy over raw character power, with Vaporize, Freeze, Aggravate, and Hyperbloom teams forming the foundation of viable compositions.
- Every team needs clearly defined roles—a main DPS, elemental applicators, sub-DPS supports, and either a healer or shield character—to ensure consistent damage output and survivability across all content types.
- Avoid stacking multiple applicators of the same element in a single team, as duplicate auras waste cooldowns and reduce reaction frequency; each reaction type requires exactly one primary applicator.
- Energy Regeneration (160%+ for Xingqiu, 150%+ for Kazuha) is as critical as Crit Rate on supports, since insufficient ER causes burst uptime to drop and elemental application to falter.
- F2P and limited-roster players should invest in free supports like Bennett, Fischl, and Kazuha rather than spreading resources across multiple DPS, as enablers multiply weak characters’ effectiveness far more than raw damage dealers.
- Weapon and artifact synergies transform average teams into elite rosters—match set bonuses to team archetypes (Emblem of Severed Fate for burst-focused supports, Blizzard Strayer for freeze DPS) and ensure artifact farming extends to supports, not just main DPS.
Why Team Composition Matters in Genshin Impact
A single overpowered character can’t carry your team forever. The moment you face enemies with elemental shields, mechanically complex boss patterns, or staggered waves in Abyss, poor composition becomes a serious liability. Proper team building multiplies your DPS output through elemental reactions, a Vaporize proc from Xingqiu’s Hydro application can nearly double your main DPS damage compared to going solo. Healers and shields also solve survivability, which lets your actual damage dealers stay on field dealing damage instead of dodging. It’s the difference between a 5-minute chamber clear and a medal-loss disaster.
Elemental application and cooldown management matter too. If your supports have longer cooldowns than your DPS rotation, you’ll face downtime where neither character is contributing meaningfully. Teams designed with proper pacing ensure continuous Hydro/Pyro/Cryo application for consistent reactions. Eventually, a well-designed team amplifies character potential far beyond what single-character builds can achieve. You’re not just collecting strong characters, you’re creating a synchronized system.
Understanding Core Team Archetypes
Genshin Impact team compositions fall into distinct patterns. Understanding these archetypes helps you identify which supports work with your main DPS and what strategy fits your playstyle. Every top-performing team in Spiral Abyss history follows one of these three frameworks.
Reaction-Based Teams
Reaction-based teams center entirely around element combinations. Vaporize teams (Pyro DPS + Hydro support) are the gold standard, units like Hu Tao, Alhaitham (with Hydro applicators), and Ayaka benefit from massive damage multipliers. Freeze teams (Cryo DPS + Hydro support) like Ayaka + Kokomi provide crowd control through Frozen status, letting you ignore enemy mechanics entirely. Aggravate teams (Electro DPS + Dendro support) power-scale Crit damage through Aggravate reactions, creating explosive burst windows.
The beauty of reaction teams is their damage ceiling, a single Vaporize crit can exceed 100K damage on optimized builds. They’re harder to gear initially but massively rewarding. These teams typically run: Main DPS → Hydro/Dendro applicator → Flex support → Healer/Shield.
Hypercarry Teams
Hypercarry teams dedicate three support slots to buffing a single character who stays on field constantly. Nahida hypercarry teams give her off-field Dendro while three supports stack Elemental Damage Bonus and Crit Rate. This playstyle maximizes a single character’s personal DPS to stratospheric levels. Kazuha buffs, Bennett provides ATK, and Fischl/Nahida applies elements, everyone serves the main carry.
Hypercarry demands precise gear (your DPS needs 60-70% Crit Rate from artifacts, not external sources). It’s less flexible with substitutions because every slot has a specific role. But the upside? An on-field main DPS dealing 8K per auto-attack means you output constant, unavoidable damage. Enemies can’t shield you away from raw damage output.
Elemental Burst-Focused Teams
Burst-focused teams revolve around spamming ultimate abilities for massive off-field damage. Characters like Kazuha, Fischl, Nahida, and Beidou do more damage off-field during their burst windows than many on-field DPS. A Fischl Hyperbloom team triggers Bloom reactions through Nahida while Fischl’s off-field Electro converts Blooms to Hyperblooms, resulting in 30K per proc without ever hitting with your main DPS.
These teams prioritize Energy Regeneration. Your supports need enough ER to burst every rotation while still dealing meaningful damage. The payoff: insane team-wide DPS where everyone contributes significantly. You can swap freely between characters, making the playstyle flexible and fun.
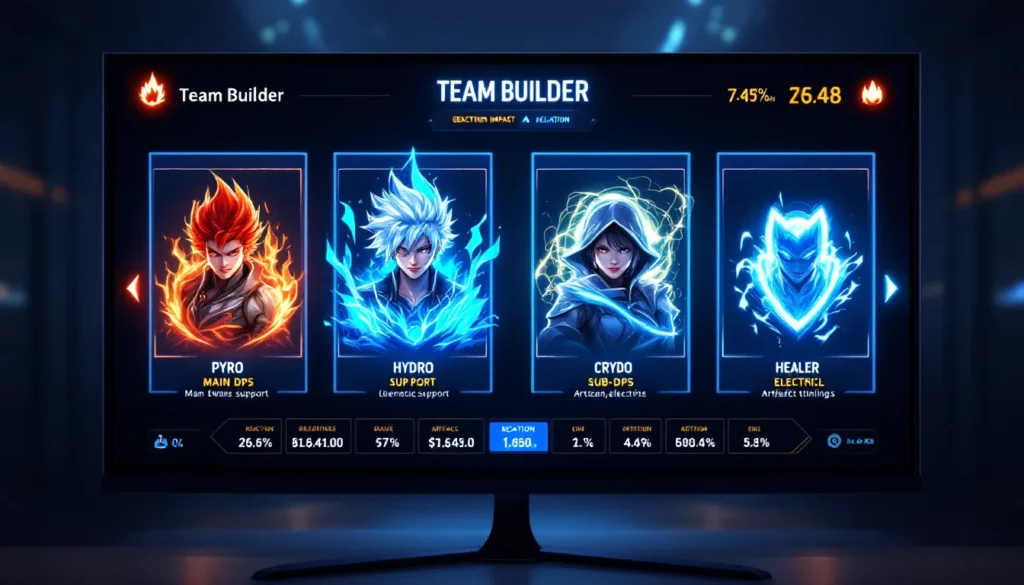
Key Roles Every Team Needs
Not every team needs all four slots filled with meta characters. But every viable composition distributes these functional roles across its four characters. Ignoring role coverage is the #1 mistake new players make.
The Main DPS Role
Your main DPS stays on field most of the rotation. They build pure offensive stats, Crit Rate, Crit Damage, and ATK%, without worrying about Elemental Mastery or Energy Regeneration. Hu Tao, Ayaka, Nahida, and Alhaitham are all main DPS who spend 8-10 seconds on field per rotation.
Choosing the right main DPS requires honest assessment of your gear. A Hu Tao with 50% Crit Rate will underperform dramatically, you need 60-70% minimum. If your artifacts are still mid-tier, safer picks like Bennett (ATK-scaling) or Fischl (Energy-independent) carry teams more reliably. Your main DPS is where you invest 80%+ of your artifact farming resources.
Support and Sub-DPS Characters
Supports provide elemental application, buffs, or crowd control from off-field. Hydro applicators like Xingqiu, Yelan, and Kokomi enable Vaporize and Freeze. Dendro applicators like Genshin Impact Nahida: Unleash and Baizhu enable Aggravate and Bloom. These characters rarely deal personal damage, they exist to empower your main DPS.
Sub-DPS like Beidou, Genshin Impact Yae Miko:, and Kazuha deal respectable off-field damage while supporting. The distinction: supports optimize for their utility (Energy Regeneration, Element Mastery), while sub-DPS still build Crit Rate and Damage. A sub-DPS might use 2-piece Wanderer’s Troupe for EM: a true support uses 2-piece Emblem of Severed Fate for burst uptime.
Healers and Shields
Healing keeps your team alive. Kokomi heals via off-field Hydro application (40% healing bonus builds). Bennett heals through ATK-scaling while buffing DPS. Shields like Zhongli negate damage entirely, letting you ignore dodging and interrupt resistance.
Shields are technically superior to healing, they’re permanent damage prevention without cooldown. But shield characters require proper placement in your rotation. Zhongli’s shield lasts 15 seconds with a 12-second cooldown: you need E-dash-swaps to maintain uptime. Healers just… heal whenever damage occurs. Picking between them depends on whether your team values CC (shields enable aggressive play) or comfort (healers require less mechanical skill).
Element Synergy and Reaction Mechanics
Elemental reactions are why team composition matters. Five elements + two auras create a web of interaction. Mastering reaction mechanics separates competent players from ones who consistently clear content.
Reaction Pairs That Work Best Together
Pyro + Hydro = Vaporize: 1.5x damage multiplier on Pyro damage (2.0x on Reverse Vaporize where Hydro hits). This is the highest single-instance damage multiplier in the game. Teams like Hu Tao + Genshin Impact Xingqiu: Master exist because of this reaction.
Cryo + Hydro = Freeze: Locks enemies in place, creating free crit rate from Blizzard Strayer artifact set (40% against frozen enemies). Ayaka + Kokomi + Genshin Impact Kokomi: Unleashing teams rely on freeze stability as much as freeze damage.
Electro + Dendro = Aggravate: Increases Crit Damage for Electro hits, stacking multiplicatively with Crit Rate. Fischl gains +25% Crit Damage per Aggravate, turning her 2K+ crits into 4K-6K monsters. Dendro + Electro + Electro = multiple Aggravates per rotation.
Dendro + Hydro = Bloom: Creates dendro cores that damage enemies on creation. Off-field applicators like Nahida create Blooms every rotation rotation. Hyperbloom (Bloom + Electro) triggers explosive reactions dealing 2-3x Bloom damage with proper EM investment.
These four reactions form 95% of viable team compositions. Everything else (Overload, Melt, Frozen) has niche uses but lower ceilings.
Avoiding Common Reaction Conflicts
This is critical: don’t run conflicting aura applicators. Fischl + Raiden Shogun in the same team both apply Electro off-field. The result? Only one Electro aura exists, so you’re applying Electro twice but triggering reactions once. You’re wasting half your applicators.
Similarly, Kokomi + Xingqiu both apply Hydro heavily. If your DPS is Pyro, you want exactly one Hydro applicator, choose the better match. Kokomi heals + applies Hydro slower but more reliably: Xingqiu applies faster but requires perfect rotation timing.
Nahida + Dendro Traveler create the same Dendro aura conflict. Run one or the other, not both, unless you’re specifically using the second for off-field Dendro damage (which is inefficient).
The rule: each reaction type needs exactly one primary applicator. A secondary applicator refreshes when the first wears off, creating seamless reaction chains. Running two primary applicators wastes cooldowns and team slots.
Top Meta Teams for Different Content Types
What works for Abyss doesn’t always work for domains. Different content rewards different strategies. Here’s what actually clears content efficiently.
Spiral Abyss Team Builds
Spiral Abyss punishes poor team composition through enemy lineups and element requirements. Chambers rotate every two weeks: the meta shifts accordingly.
Current meta (as of March 2026 patch 4.5):
-
Hu Tao + Hydro Applicator (Xingqiu or Yelan) + Kazuha/Nahida + Zhongli: The permanent Abyss team. Vaporize damage scales infinitely with investment. Zhongli eliminates interruption, letting Hu Tao charge attack spam without dodging. Against single large enemies (bosses, Rifthounds), this team deletes health bars in seconds.
-
Fischl + Nahida + Kazuha + Kokomi: Hyperbloom core. Fischl’s off-field Electro triggers Hyperbloom every 1.5 seconds through Nahida’s Dendro + Kokomi’s Hydro. Deals 30K per Hyperbloom reaction without caring about your on-field DPS. Works on any element main DPS because Hyperbloom damage scales off EM and character level, not DPS stats.
-
Ayaka + Kokomi + Kazuha + Fischl: Reverse Melt freeze variant. Ayaka deals Cryo damage, Kokomi applies Hydro + heals, Kazuha buffs Cryo damage, Fischl adds Electro for Aggravate Crit Damage. Trades pure freeze stability for higher Crit Damage when enemies aren’t grouped.
-
Alhaitham + Nahida + Kazuha + Kokomi: Dendro + Hydro Bloom core. Alhaitham creates Dendro damage while off-field Dendro applicators (Nahida) trigger Hyperbloom. Kazuha buffs both Dendro and Hydro simultaneously. Provides comfortable EM scaling and heals.
Building for Abyss requires 36-star gear: 70-80% Crit Rate, 150-200% Crit Damage, maxed talents on main DPS (9-10), level 80+ characters. If your artifacts aren’t near these thresholds, focus on farming better gear before attempting 36-star floors.
Open World and Domain Farming Teams
Domains care less about composition, they’re shorter, easier encounters. Your goal: minimize clear time, maximize element advantage against the domain’s immune shields.
For most domains (Hydro-heavy like Liyue domains):
Pyro applicator (Fischl, Beidou, or Genshin Impact Citlali: Unveiling) breaks shields with Vaporize or Overload. Pair with any strong DPS, domains die so fast you barely notice team synergy. A 4-star DPS like Barbara or Genshin Impact Kaeya: Unraveling works.
Open world domains (commissions, events):
Bring Anemo supports for crowd control. Kazuha, Venti, or Wanderer group enemies and deal off-field damage simultaneously. Even a poorly built support Kazuha turns a 3-minute domain into a 1-minute faceroll.
The key difference: Abyss demands optimization: farming demands speed. Use your main DPS teams for Abyss, then swap to whatever clears fastest for farming. A single OP DPS + Kazuha + Kokomi clears domains faster than perfectly synergized teams because AoE grouping multiplies damage output.
How to Build Teams with F2P and Limited Characters
Not every player has Hu Tao, Fischl (before her recent banner), or Nahida. F2P rosters are valid, you just need smart composition choices.
Creating Effective Teams on a Budget
F2P characters are stronger than ever. Bennett and Fischl are arguably top-3 supports in the entire game, both free from Abyss/events. Dendro Traveler applies Dendro competently. Barbara provides Hydro healing without a gacha pull. Kazuha was free during Kazuha’s first banner, if you missed him, Sucrose (free from Spiral Abyss) provides 90% identical functionality at 4-star rarity.
A viable F2P Vaporize team: Yanfei (Pyro DPS from free 4-star standard pulls) + Xingqiu (free from Spiral Abyss, later Lantern Rite rerun) + Kazuha (limited but available annually) + Bennett (free from Spiral Abyss). This team clears Abyss comfortably without a single limited 5-star because Xingqiu’s Hydro application is so good that a 4-star Pyro DPS benefits enormously.
Another F2P route: Dendro Traveler + Fischl (free from past event) + Kazuha + Barbara. Fischl applies Electro, Dendro Traveler applies Dendro, Kazuha buffs both while grouping, Barbara heals. Clear entry-level Abyss easily even though zero limited 5-stars.
The principle: invest heavily in one or two strong supports (Bennett, Fischl, Kazuha) instead of spreading resources across multiple DPS. Good supports carry weak DPS: strong DPS with bad supports underperforms.
Farmable Character Combinations
Cryo Freeze without Ayaka/Ganyu:
- Main DPS: Chongyun (4-star Cryo claymore, infuses normal attacks with Cryo). You farm Liyue domains for his artifacts.
- Hydro: Xingqiu (free, provides Hydro off-field).
- Cryo Support: Rosaria (free from Spiral Abyss, crit rate buff).
- Healer: Barbara (free starter character).
Chongyun isn’t a world-beater, but this team uses exclusively farmable/free characters and clears low-mid Abyss.
Electro Aggravate without Fischl/Nahida (older rosters):
- Main DPS: Razor (4-star Electro claymore, personal DPS focused). Farm Wolvendom ley lines.
- Electro Support: Beidou (4-star Electro claymore, off-field Electro). Farm the same ley lines.
- Cryo/Pyro: Any 4-star with element application (Amber, Thoma).
- Healer: Bennett or Barbara.
Razor doesn’t trigger Aggravate optimally, but he outputs consistent damage while Beidou’s off-field Electro supports him.
General F2P scaling principle: Limited 5-stars provide convenience (higher damage ceiling, faster clears). But limited 4-stars and farmable characters enable full-team viability at lower power levels. Invest in free supports first, then chase limited 5-stars when you want to optimize further.
Weapon and Artifact Synergies for Team Optimization
Team composition extends beyond character picks, weapons and artifacts create synergies that transform average teams into god-tier rosters.
Artifact synergies for specific team types:
Vaporize teams prioritize Crit Rate/Damage on DPS (Shimenawa’s Reminiscence for ATK, Crimson Witch for Pyro damage). Supports use Emblem of Severed Fate (ER scales into damage on burst-focused characters like Xingqiu). A Xingqiu with 200% ER in Emblem converts excess ER into Hydro damage and burst uptime, he applies Hydro faster, enabling more Vaporize procs.
Freeze teams stack Blizzard Strayer on the Cryo DPS (40% Crit Rate against frozen enemies lets you skip Crit Rate entirely, pivoting all stats into Crit Damage and ATK). Kazuha in the same team uses 2-piece Viridescent Venerer + 2-piece ATK (Shimenawa/Gladiator) to buff Cryo damage while grouping. Kokomi uses 2-piece Healing Bonus + 2-piece Hydro (Tenacity of the Millelith works here too for team ATK buff).
Hyperbloom teams require Elemental Mastery on the Electro applicator (Fischl with 600+ EM on Hyperbloom triggers 20K+ damage). The DPS character can ignore EM entirely, they exist to keep enemies alive long enough for reaction triggers. This creates a weird dynamic where your “weakest” character (EM-focused Fischl) deals more damage than your DPS.
Weapon synergies across team compositions:
- Hu Tao + Staff of Homa: Homa provides HP scaling (Hu Tao needs max HP to maximize damage). Any other Pyro DPS loses this synergy.
- Fischl + Polar Star: Polar Star scales with normal attacks. Fischl shoots during her E and burst, stacking Polar Star’s passive. No other Electro applicator uses Polar Star as effectively.
- Kazuha + Mistsplitter or Freedom-Sworn: Freedom-Sworn provides Elemental Damage Bonus to the entire team when Kazuha triggers reactions. This becomes a multiplier on everyone’s damage.
- Nahida + Deepwood Memories + A Freedom-Sworn weapon: Nahida applies Deepwood Memories (Dendro RES shred) while Deepwood Memories artifact set applies additional Dendro RES shred. You stack two Dendro RES shred effects simultaneously, making Dendro DPS deal obscene damage.
Building weapons and artifacts requires understanding these synergies. A Fischl with Polar Star and 40% Crit Rate in a hyperbloom team might deal 50K Hyperbloom procs. The same Fischl with Stringless and 40% Crit Rate deals 15K because you’re not leveraging weapon synergy. Genshin Battle Techniques: Master offers deeper tactical breakdowns if you want to optimize rotations further.
The principle: match weapons to characters and team roles. A 5-star weapon on a poorly-synergized team underperforms compared to a 4-star weapon on an optimized composition.
Common Team Building Mistakes to Avoid
Most players don’t consciously build teams, they throw strong characters together and wonder why they struggle. Here are the actual mistakes holding you back.
Mistake 1: Stacking multiple applicators of the same element
Running Bennett + Kazuha + Fischl + Raiden Shogun creates elemental chaos. Bennett applies Pyro, Kazuha applies Pyro off-field via swirl, Fischl applies Electro, Raiden applies Electro. Your reactions fire sporadically because you’re overloading the aura system. Pick one applicator per reaction type and commit.
Mistake 2: Ignoring Energy Regeneration on support characters
Xingqiu needs 160%+ ER to burst every rotation. Without ER, he bursts every 1.5 rotations instead of every rotation, you lose 33% of his Hydro application. Your Vaporize damage plummets. Same issue applies to Kazuha (150%+ ER), Kokomi (140%+ ER), and any burst-focused support. ER is as important as Crit Rate on DPS.
Mistake 3: Swapping characters mid-rotation for no reason
Consistent uptime matters more than max personal damage. If your support’s burst is off cooldown and your main DPS has 3 seconds of field time left, let the DPS finish their rotation, don’t swap early. Frequent swapping introduces downtime where nobody is dealing damage.
Mistake 4: Choosing shields over healing without healer backup
Zhongli shields are permanent, but once they break (against Abyss lectors or certain boss mechanics), you’re vulnerable. If you don’t have a second source of healing, you’re gambling. Always pair shields with at least off-field healing (Bennett, Kokomi, even a healing pet via artifact if using Venti). Comfort is worth the team slot.
Mistake 5: Building DPS with reaction-focused artifacts
A Hu Tao with 4-piece Burning Ley Line Locus (boosts Burning damage) is completely useless. Hu Tao triggers Vaporize (Pyro damage multiplier), not Burning. Use Shimenawa’s Reminiscence or Crimson Witch, both multiply her actual damage. Artifact set bonuses matter more than individual substats.
Mistake 6: Ignoring element advantage in domains
Most domain healers apply specific elements. Frost domains poison Pyro enemies: Crimson domains poison Hydro enemies. Bringing a Pyro DPS to a Frost domain means you’re actively working against the domain’s mechanics. Swap to a Hydro or Cryo DPS instead. It’s not about power, it’s about not handicapping yourself.
Mistake 7: Assuming every limited 5-star is needed
Pull for supports and enablers, not DPS. Bennett, Kazuha, and Fischl enabled more Abyss clears than any 5-star DPS in the history of Genshin. A new player pulling Hu Tao without Xingqiu is stuck. That same player pulling Bennett and Fischl can clear most content with 4-star DPS. Resources are finite, invest in character enablers, not raw damage dealers.
Mistake 8: Not farming your support artifacts
Players farm 1000+ artifact domains trying to hit 60% Crit Rate on DPS, then throw supports into level-20 artifacts because “they’re supports.” A Kazuha with 600+ EM on 2-piece Viridescent Venerer buffs your entire team’s damage more than upgrading your DPS by one Crit Rate tier. Supports deserve artifact investment.
These mistakes repeat across thousands of players. Avoiding them immediately puts you ahead of casual rosters.
Conclusion
Team composition in Genshin Impact isn’t about collecting the strongest characters, it’s about building systems where every member contributes meaningfully. A well-constructed team amplifies individual power through elemental reactions, support buffs, and role coverage. Whether you’re running meta Abyss compositions or experimenting with F2P rosters, the fundamentals remain: choose a viable archetype (reaction-based, hypercarry, or burst-focused), fill every essential role, ensure elemental synergy, and invest in artifacts alongside your characters.
The meta evolves with new character releases and patch changes. But the core principles, understanding reaction mechanics, matching weapons to teams, and avoiding composition conflicts, translate across every era of Genshin Impact. Start by identifying what type of team appeals to your playstyle, commit to one composition until you gear it properly, then branch out with alternate teams. Resources like Game8, RPG Site, and Twinfinite provide updated tier lists and meta breakdowns if you want real-time adjustment data as content shifts. Your job is execution, farm the artifacts, level your characters, and trust the system. The rest follows naturally.